

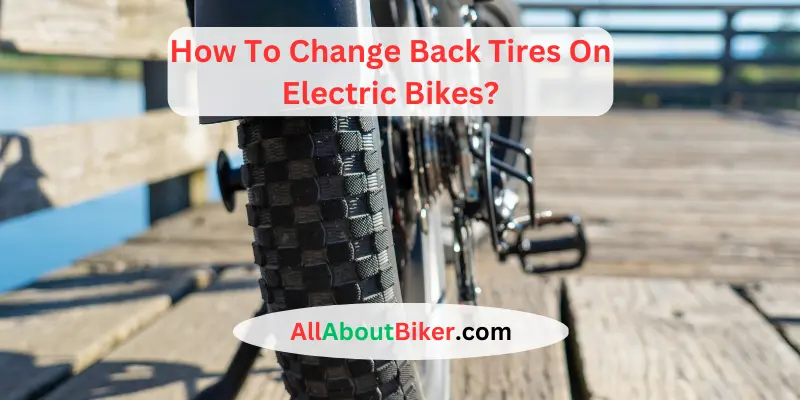
Electric bikes are becoming increasingly popular for their eco-friendliness and efficiency. However, like traditional bikes, electric bikes may also experience punctured or worn-out tires, requiring replacement. Knowing how to change the back tires of an electric bike is a handy skill that can save you time and money.
This is Oscar C. Hickerson, one of the best electric bike specialists in the biking world. In this guide, I will walk you through the step-by-step process of changing back tires on an electric bike. As a result, you can get back to riding in no time.
10 Steps To Change Back Tires On Electric Bikes:
Whether you’re a seasoned cyclist or a beginner, this guide will provide you with all the information you need to successfully change the back tire on your electric bike.
Here are the steps to follow:
- Gather the necessary tools: In the very first step, you’ll need to have the following tools and equipment:
- a bike tire lever,
- a new tire,
- a new inner tube,
- a bike pump,
- and a wrench (if your bike has a bolt-on rear wheel).
- Turn off the electric bike: Before starting work on the bike, make sure to turn off the power.
- Remove the wheel: If your bike has a quick-release lever, simply flip it to release the wheel from the frame. If your bike has a bolt-on wheel, use the wrench to loosen the bolts and remove the wheel from the frame.
- Remove the tire: Use the bike tire lever to pry the tire away from the rim. Work your way around the rim until the entire tire is off.
- Remove the inner tube: Once the tire is off, remove the inner tube from the tire. If you’re unsure where the puncture is, inflate the inner tube slightly and listen for hissing sounds or look for visible punctures.
- Install the new tire: Put the new tire on the rim, making sure that the arrow on the tire points in the direction of rotation. Then use the tire lever to push the tire back onto the rim.
- Install the new inner tube: Inflate the new inner tube slightly and then insert it into the tire. Work your way around the rim, making sure that the inner tube is tucked neatly into the tire.
- Reinstall the wheel: Put the wheel back onto the bike frame, making sure that the chain is properly seated on the gears. Tighten the bolts or flip the quick-release lever to secure the wheel in place.
- Inflate the tire: Use a bike pump to inflate the tire to the recommended pressure (this information can usually be found on the sidewall of the tire).
- Test the bike: Once the tire is inflated, turn on the electric bike and take it for a short test ride to make sure everything is working properly.
5 Tips For You While Changing Back Tires On Your Electric Bike:
Here are a few tips to keep in mind when changing the back tire on your electric bike:
- Safety first: Make sure to turn off the power to your electric bike before you start working on it. This will prevent any accidental injuries.
- Check the tire size: Make sure to purchase a tire that is the correct size for your electric bike. The tire size can usually be found on the sidewall of your old tire.
- Check the condition of the rim tape: The rim tape is the strip of material that sits between the inner tube and the rim. Make sure that the rim tape is in good condition and replace it if necessary.
- Inflate the new inner tube slightly: Before installing the new inner tube, inflate it slightly to make it easier to handle and to prevent it from getting twisted or pinched when you insert it into the tire.
- Install the tire correctly: Make sure that the arrow on the tire points in the direction of rotation. Installing the tire in the wrong direction can affect the performance of your electric bike.
You may also read: how to use walk mode on bosch e-bikes?
Giant Electric Bike Rear Wheel Removal: Know The Process
If you need to remove the rear wheel on your giant electric bike, here is a general process to follow:
- Shift gears: Before removing the wheel, shift the gears to the smallest cog on the rear cassette. This will help you remove the wheel more easily.
- Release the brakes: Release the brake caliper by either opening the quick-release lever or loosening the bolt that attaches the brake to the frame.
- Remove the axle nuts: Loosen the nuts on both sides of the axle using a wrench. If your bike has a thru-axle, you may need to use a special tool to remove it.
- Remove the wheel: Carefully lift the wheel out of the frame dropouts, taking care not to damage the derailleur or other components.
- Reinstall the wheel: To reinstall the wheel, simply reverse the process. Make sure the wheel is fully seated in the dropouts, then tighten the axle nuts or thru-axle to the recommended torque setting. Test the wheel to make sure it spins freely and the brakes are working properly.
Is The Rear Wheel Removal Process The Same On All E-Bikes?
No! The rear wheel removal process is not the same on all e-bikes. It depends on the specific make and model of your e-bike. While some e-bikes may have a rear wheel removal process that is similar to traditional bicycles, on the other hand, others may have unique features or components that require additional steps or tools.
For example, some e-bikes may have a hub motor or a rear derailleur that requires special attention when removing the rear wheel. Additionally, some e-bikes may have a rear wheel that is secured with a thru-axle rather than a quick-release skewer.
Therefore, it’s important to refer to the owner’s manual or manufacturer’s instructions for your specific e-bike when removing the rear wheel. If you are unsure or uncomfortable with the process, it may be best to seek assistance from a bike mechanic or e-bike specialist.
When Should You Remove the Rear Wheels On Your e-Bike?
There are several situations when you might need to remove the rear wheel of your bike:
- Flat tire: If you have a flat tire, you will need to remove the rear wheel to fix or replace the inner tube.
- Maintenance: If you need to perform maintenance on the rear wheel or drivetrain, such as replacing the cassette or cleaning the chain, you will need to remove the rear wheel.
- Transport: If you need to transport your bike in a car or on a bike rack, you may need to remove the rear wheel to make it easier to transport.
- Upgrading or replacing parts: If you want to upgrade or replace the rear wheel, cassette, or other components, you will need to remove the rear wheel to make the necessary changes.
Regardless of the reason for removing your rear wheel, it’s important to follow proper safety procedures and ensure that the wheel is reinstalled correctly before riding your bike again.
How Frequently Should I Change Back Tyres On Electric Bikes?
The frequency of replacing the back tire on your electric bike depends on various factors. The most common ones are the quality of the tire, your riding style, and the condition of the roads you ride on.
However, in general, it is recommended to replace the back tire on an electric bike every 1,500 to 3,000 miles. When the tire tread wears down to 1-2 millimeters. If you frequently ride on rough or abrasive roads, you may need to replace your tire more often.
Similarly, if you ride your electric bike more aggressively or carry heavy loads, it can put more wear and tear on the tire, which may require more frequent replacements. It’s important to keep an eye on your tire’s condition regularly to ensure it’s in good shape. Signs that it’s time to replace your tire include visible cuts or punctures, excessive wear or balding, or a cracked sidewall.
Ultimately, the best way to determine when to replace your back tire is by inspecting it regularly and using your judgment based on its condition and your riding habits.
How To Change Back Tire On Nakto Electric Bikes?
If you own a Nakto electric bike and need to change the back tire, you may be wondering where to start. Here’s a step-by-step guide on how to change the back tire on your Nakto electric bike:
- Turn off the power: Before starting, make sure to turn off the power to your electric bike to avoid any accidental injury or electrocution.
- Remove the wheel: Use a wrench or an Allen key to loosen the bolts or the quick-release lever on the rear wheel of your Nakto electric bike. Carefully lift the wheel off the bike frame and set it aside.
- Deflate the tire: Use a bike pump or a valve wrench to deflate the tire completely. Once it’s deflated, use a tire lever to pry the tire off the rim. Remove the old inner tube from inside the tire.
- Check the rim tape: Check the rim tape on the rim of the wheel. Make sure that it’s in a good condition and replace it if necessary.
- Install the new tire: Insert the new inner tube into the tire, and then place the tire back onto the rim. Make sure that the arrow on the tire points in the direction of rotation. Use the tire lever to carefully tuck the tire bead back onto the rim.
- Inflate the tire: Use a bike pump to inflate the tire to the recommended pressure listed on the sidewall of the tire.
- Reinstall the wheel: Carefully reattach the wheel back onto the bike frame, making sure to line up the axle with the dropouts on the frame. Tighten the bolts or quick-release lever to the correct torque specification.
- Test the bike: Take your Nakto electric bike for a short test ride to make sure everything is working correctly.
How Do You Install A Rear Wheel e-Bike Conversion Kit?
Installing a rear-wheel e-bike conversion kit can be a great way to convert your traditional bike into an electric bike. Here are the steps to install a rear-wheel e-bike conversion kit:
- Remove the existing wheel: Using a wrench, loosen and remove the nuts or quick-release skewer holding the wheel in place. Carefully lift the wheel off the bike frame and set it aside.
- Install the motor wheel: Insert the motor wheel into the bike frame, making sure the axle fits securely into the dropouts. Tighten the nuts or quick-release skewer to hold the wheel in place.
- Attach the controller: Mount the controller onto the bike frame, close to the battery location. The controller should have a wiring diagram that shows which wires connect to which components.
- Connect the wiring: Connect the motor wires to the controller, following the wiring diagram. Connect the battery to the controller, again following the wiring diagram.
- Install the throttle: Mount the throttle onto the handlebars, making sure it is securely fastened.
- Install the pedal sensor (if required): Some conversion kits require a pedal sensor to be installed, which detects when you are pedaling and sends a signal to the controller to engage the motor.
- Install the brake levers (if required): Some conversion kits come with brake levers that have cut-off switches. These switches cut power to the motor when the brakes are applied. Install these brake levers onto the handlebars.
- Test the system: Turn on the power to the system and test the motor and throttle. Make sure everything is working correctly and make any necessary adjustments.
Conclusion:
I hope now you know how to change the back tire on an electric bike. Changing the back tire on an electric bike can seem daunting at first, but with the right tools, knowledge, and a bit of patience, it can be a straightforward process. Proper maintenance of your e-bike’s tires is crucial for ensuring a safe and comfortable riding experience, as well as extending the lifespan of your bike.
Remember to check your tire pressure regularly, keep an eye out for signs of wear and tear, and replace your tires when necessary. By following the steps outlined in this guide, you should be able to change your e-bike’s back tire with ease and get back to enjoying your ride in no time.